前回から、Backbone.jsに取り組み始めました。
今回は、Backbone.Routerを試してみます。
目次
使い方
とてもシンプルだなと感じました。
src\router\router.jsを作成します。
src\router\router.js1
2
3
4
5
6
7
8
9
10
11
12
13
14
15
16
17
18
19
20
| const Backbone = require("backbone");
const myrouter = Backbone.Router.extend({
routes: {
sample_a: "sample_A",
sample_b: "sample_B",
"*path": "default",
},
default: function () {
console.log("default");
},
sample_A: function () {
console.log("sample_A");
},
sample_B: function () {
console.log("sample_B");
},
});
module.exports = myrouter;
|
/#sample_aにブラウザでアクセスしたとき、sample_Aメソッドが実行されます。
"*path"は、defaultメソッドが実行されます。
"*path"は、/#sample_aや/#sample_bに合致しなかったとき、実行されるものを指定しています。
src/index.jsを以下のように作成します。
src/index.js1
2
3
4
5
| const Backbone = require("backbone");
const MyRouter = require("./router/router");
const router = new MyRouter();
Backbone.history.start();
|
ここまでの 2 つの.js ファイルをwebpackでバンドルして使います。
バンドルした JavaScript を実行する index.html を以下のように用意します。
1
2
3
4
5
6
7
8
9
10
11
12
13
14
| <!DOCTYPE html>
<html>
<head>
<title>webpack-Backbone-router</title>
</head>
<body>
<div>
<a href="#sample_a">リンクA</a>
<a href="#sample_b">リンクB</a>
<a href="#sample_none">リンクそれ以外</a>
</div>
<script src="app.js"></script>
</body>
</html>
|
一旦動作確認
npm run serveを実行し確認します。
以下の表示になります。

リンクが 3 つ見えます。
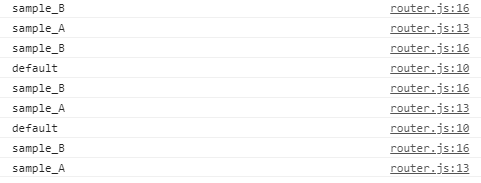
Chorme 開発ツールを開いて確認するとクリックごとにコンソールへログが残ります。
この時、ブラウザの URL を見ると連動しています。

ブラウザでの表示を切り替えてはいませんが、Backbone.Routerを最小構成で確認できました。
画面の切り替えをやってみる
準備
今度は、画面の切り替えを組み込んでみます。
今回は bootstrap を使用するので、不足しているパッケージを導入します。
加えて、style-loaderとcss-loaderを導入します。
1
2
| npm i --save bootstrap popper.js
npm i --save-dev style-loader css-loader
|
style-loaderとcss-loaderを使用できるようにwebpack.config.jsを編集します。
webpack.config.js1
2
3
4
5
6
7
8
9
10
11
12
13
14
15
16
17
18
19
20
21
22
23
24
25
26
27
| module.exports = {
mode: "development",
entry: `./src/index.js`,
output: {
path: `${__dirname}/dist`,
filename: "app.js",
},
devServer: {
contentBase: "dist",
open: true,
},
devtool: "inline-source-map",
module: {
rules: [
{
test: /\.css$/,
use: ["style-loader", "css-loader"],
},
],
},
};
|
実装
src/router/router.jsを以下のように作成しました。
src/router/router.js1
2
3
4
5
6
7
8
9
10
11
12
13
14
15
16
17
18
19
20
21
22
23
24
25
26
27
28
29
30
31
32
33
34
35
36
37
38
39
40
41
| const Backbone = require("backbone");
const $ = require("jquery");
const myrouter = Backbone.Router.extend({
routes: {
home: "home",
links: "links",
lists: "lists",
"*path": "default",
},
home: function () {
resetActive();
console.log("HOME");
$("#home").addClass("active");
$("#content").html("<h2>Home-Content</h2>");
},
links: function () {
resetActive();
$("#links").addClass("active");
console.log("LINKS");
$("#content").html("<h2>Links-Content</h2>");
},
lists: function () {
resetActive();
$("#lists").addClass("active");
console.log("LISTS");
$("#content").html("<h2>Lists-Content</h2>");
},
default: function () {
console.log("DEFAULT");
this.navigate("#home", { trigger: true });
},
});
const resetActive = () => {
$(".nav-link").removeClass("active");
};
module.exports = myrouter;
|
src/index.jsを以下のように作成しました。
src/index.js1
2
3
4
5
6
7
8
9
10
|
import "bootstrap/dist/css/bootstrap.min.css";
import "bootstrap";
const Backbone = require("backbone");
const MyRouter = require("./router/router");

const router = new MyRouter();
Backbone.history.start();
|
dist/index.htmlを以下のように作成しました。
dist/index.html1
2
3
4
5
6
7
8
9
10
11
12
13
14
15
16
17
18
19
20
21
22
23
24
| <!DOCTYPE html>
<html>
<head>
<title>webpack-Backbone</title>
</head>
<body>
<div class="container">
<h1>Links</h1>
<ul class="nav nav-tabs">
<li class="nav-item">
<a class="nav-link" href="#home" id="home">Home</a>
</li>
<li class="nav-item">
<a class="nav-link" href="#links" id="links">Links</a>
</li>
<li class="nav-item">
<a class="nav-link" href="#lists" id="lists">Lists</a>
</li>
</ul>
<div id="content"></div>
</div>
<script src="app.js"></script>
</body>
</html>
|
確認
npm run serveを実行し確認します。
以下の表示になります。

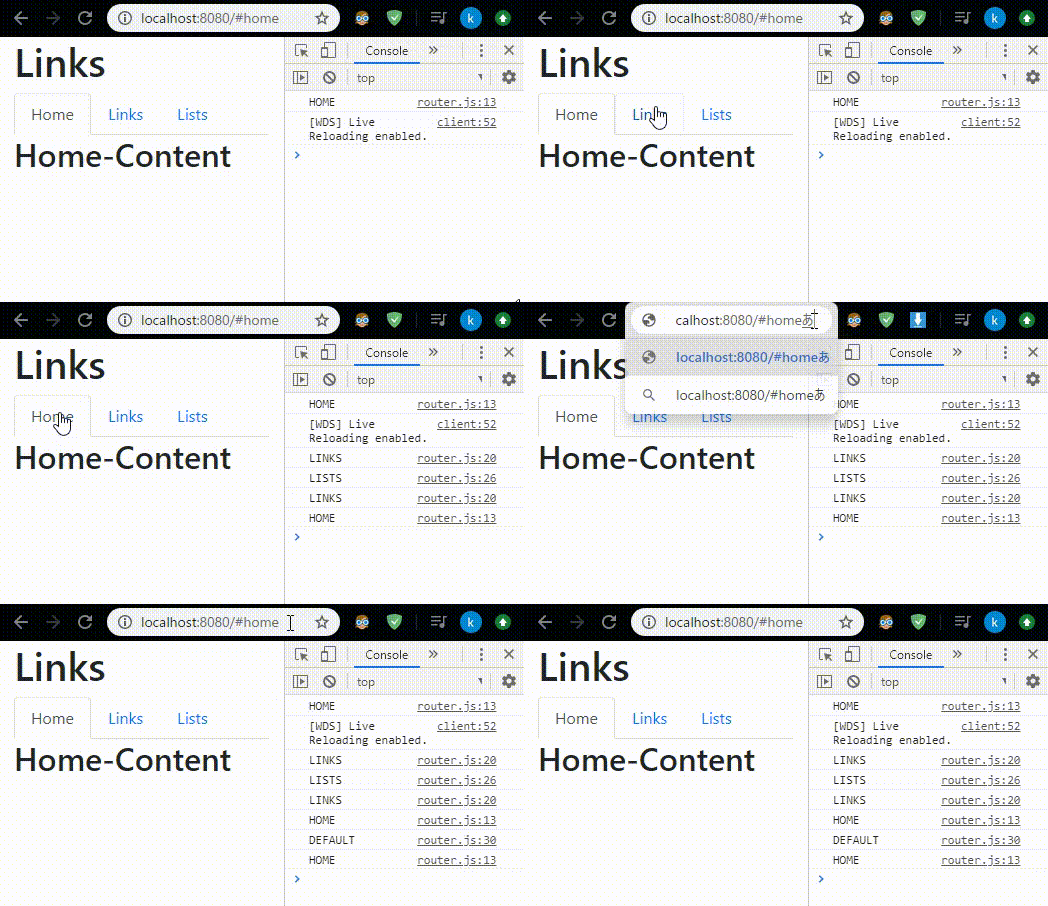
タブをクリックすると表示が書き換わっているのと、対応する URL への変更が確認できます。
また、合致しない URL を直接入力したとき、/#homeに転送されています。
今回は$("#content").html("<h2>Lists-Content</h2>");のように固定の HTML を設定しています。
Backbone.View からレンダリングした HTML を設定すれば、アプリケーションとして成立するものが作れそうです。
今回は、Backbone.Routerを試してみました。
Bootstrap との連携もできたので良かったです。
ではでは。


