この前触った、WebNFC に味をしめて実験的な API を今後も触ってゆきたいと感じました。
今回は、バーコードの読み取りをしてみます。
目次
参考
Shape Detection API
Shape Detection API を使用すると、文字列・顔・バーコードの認識が可能になります。
用意
今回も、Experimental Web Platform featureを有効化する必要があります。
WebNFC を試そう を参照して設定ください。
実装 1(画像の中のバーコードを読み取る)
読み取る対象の qr コードを表示する html は以下のようになります。
test1.html(QRコードの場合)1
2
3
4
5
6
7
| <html>
<head> </head>
<body>
<img src="qr.png" id="source" />
<script type="text/javascript" src="app1.js"></script>
</body>
</html>
|
バーコードを読み取る場合、 html は以下のようになります。画像を差し替えるだけです。
test1.html(バーコードの場合)1
2
3
4
5
6
7
| <html>
<head> </head>
<body>
<img src="code39.png" id="source" />
<script type="text/javascript" src="app1.js"></script>
</body>
</html>
|
処理する JavaScript は以下のようになります。
app1.js1
2
3
4
5
6
7
8
9
10
11
12
13
14
15
16
17
18
19
20
21
22
23
24
25
26
27
28
29
30
31
32
33
34
| const barcodeDetector = new BarcodeDetector();
const image = document.getElementById("source");
console.log(image);
let code = null;
(async () => {
try {
code = await barcodeDetector.detect(image);
} catch {
$("#result").text("ERROR");
}
if (code == null) {
return;
}
console.log(code);
let resultText = "";
for (const barcode of code) {
resultText += `
<ul>
<li>rawValue = ${barcode.rawValue}</li>
<li>format = ${barcode.format}</li>
<li>width = ${barcode.boundingBox.width}</li>
<li>height = ${barcode.boundingBox.height}</li>
<li>x = ${barcode.boundingBox.x}</li>
<li>y = ${barcode.boundingBox.y}</li>
</ul>
`;
}
$("#result").html(resultText);
})();
|
確認 1
こちらを、Android で動作させ確認します。
デバッグ方法は、WebNFC を試そう を参照して設定ください。
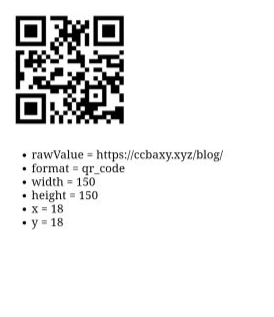
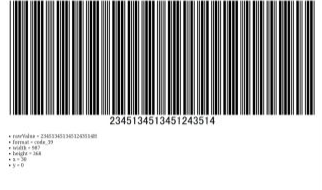
こちらを読み込むと次のように表示されます。
QR コードの場合

Code-39 の場合

Shape Detection APIを使用し、読み込むことのできる 1 次元 2 次元バーコードは、以下のものが記載されています。
作り方が悪かった可能性はあるのですが、読み取れないものもあったので以下に掲載します。
aztec(作成する手段が見つからなかった)code_128(OK)code_39(OK)code_93(OK)codabar(OK NW-7 の別名が codebar 作成するときは、NW-7 を探すほうが楽)data_matrix(NG?)ean_13(OK JAN_13 として作成したバーコードは ean_13 として認識された)ean_8(OK JAN_8 として作成したバーコードは ean_8 として認識された)itf(OK)pdf417(OK)qr_code(OK)upc_a(OK)upc_e(OK)
ちなみに、1 次元バーコードを 90 度まわして動作確認してみましたが、しっかり読み取りできました。
実装 2 カメラから読み込む
画像からバーコードを読み取ったので、今度はカメラから取得してみます。
実装は以下の通りです。
test2.html1
2
3
4
5
6
7
8
9
10
11
12
13
14
15
16
| <html>
<head>
<script
src="https://code.jquery.com/jquery-3.5.1.slim.min.js"
integrity="sha256-4+XzXVhsDmqanXGHaHvgh1gMQKX40OUvDEBTu8JcmNs="
crossorigin="anonymous"
></script>
</head>
<body>
<div id="canvas_area">
<canvas id="result" width="300" height="300"></canvas>
</div>
<div id="result_text"></div>
<script type="text/javascript" src="app2.js"></script>
</body>
</html>
|
app2.html1
2
3
4
5
6
7
8
9
10
11
12
13
14
15
16
17
18
19
20
21
22
23
24
25
26
27
28
29
30
31
32
33
34
35
36
37
38
39
40
41
42
43
44
45
46
47
48
49
50
51
52
53
54
55
56
57
58
59
60
61
62
63
64
65
66
67
68
69
70
71
72
73
74
75
76
77
78
79
80
81
82
83
84
85
86
87
88
89
90
91
92
93
94
95
96
97
98
99
100
101
102
103
104
105
106
107
108
109
110
111
112
113
114
115
116
117
118
119
120
| const barcodeDetector = new BarcodeDetector();
const image = document.createElement("video");
const offscreen_canvas = document.createElement("canvas");
const offscreen_context = offscreen_canvas.getContext("2d");
const canvas = document.querySelector("#result");
const context = canvas.getContext("2d");
offscreen_canvas.width = canvas.width;
image.videoWidth = canvas.width;
offscreen_canvas.height = canvas.height;
image.videoHeight = canvas.height;
let code = null;
window.onload = async () => {
const stream = await navigator.mediaDevices.getUserMedia({
video: {
facingMode: { exact: "environment" },
},
});
image.srcObject = stream;
image.play();
analysis();
setInterval(() => {
reflesh();
}, 800);
};
const analysis = async () => {
offscreen_context.drawImage(image, 0, 0);
try {
code = await barcodeDetector.detect(image);
} catch {
window.requestAnimationFrame(analysis);
return;
}
let state = true;
if (code == null) {
state = false;
}
if (state == true && code.length == 0) {
state = false;
}
if (state) {
offscreen_context.strokeStyle = "rgb(255, 0, 0) ";
offscreen_context.lineWidth = 10;
offscreen_context.beginPath(
code[0].cornerPoints[0].x,
code[0].cornerPoints[0].y
);
offscreen_context.lineTo(
code[0].cornerPoints[1].x,
code[0].cornerPoints[1].y
);
offscreen_context.lineTo(
code[0].cornerPoints[2].x,
code[0].cornerPoints[2].y
);
offscreen_context.lineTo(
code[0].cornerPoints[3].x,
code[0].cornerPoints[3].y
);
offscreen_context.lineTo(
code[0].cornerPoints[0].x,
code[0].cornerPoints[0].y
);
offscreen_context.closePath();
offscreen_context.stroke();
}
context.drawImage(offscreen_canvas, 0, 0, canvas.width, canvas.height);
window.requestAnimationFrame(analysis);
};
const reflesh = () => {
$("#result_text").empty();
if (code == null) {
$("#result_text").text("ERROR");
return;
}
if (code.length == 0) {
$("#result_text").text("ERROR");
return;
}
let resultText = "";
for (const barcode of code) {
resultText += `
<ul>
<li>rawValue = ${barcode.rawValue}</li>
<li>format = ${barcode.format}</li>
<li>width = ${barcode.boundingBox.width}</li>
<li>height = ${barcode.boundingBox.height}</li>
<li>x = ${barcode.boundingBox.x}</li>
<li>y = ${barcode.boundingBox.y}</li>
</ul>
`;
}
$("#result_text").html(resultText);
};
|
確認 2
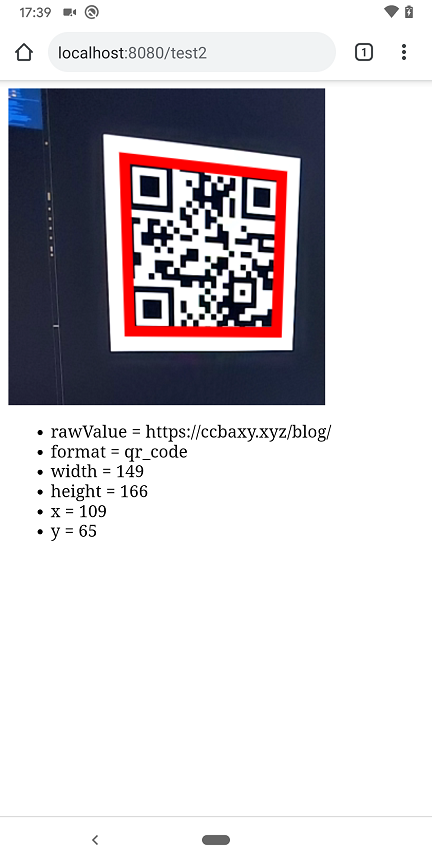
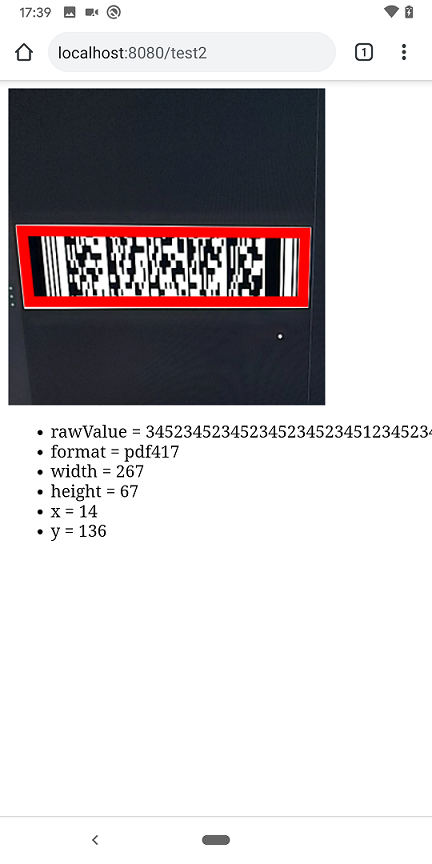
動作させてみました。
QR コードの場合

pdf417 の場合

カメラから取得した画像を基に、バーコードの値の読み取りと、枠を描くことができました。
今回、バーコードの読み取りをするにあたり対応するバーコードを一通り確認しました。
線と空白の羅列のように見えて規格がたくさんあるというのが 1 つの発見でした。
また、pdf417 規格のコードは「もう、バーコードに見えない。」「なんかかっこいい。」というのが、正直な感想でした。
次回は、(思い付きがなければ)顔の取得を試みてみます。
ではでは。


