dat.GUI と tweakpane

ドットインストールのTweakpane 入門と、dat.GUI 入門をやりました。

パラメータ調整用のライブラリというものを初めて触りました。
文字列のコントロールについては、取り扱いがなかったのでドキュメントを読みながらやってみたので、サンプルを残しておきます。

目次

参考

準備

適当なディレクトリで、以下を実行し準備します。

1
2
3
4
5
6
7
npm init -y
npm install http-server --save-dev
mkdir public
mkdir public/js

# localhost:3000でpublicディレクトリを公開する
npx http-server -p 3000

用意できたらpublic/index.htmlpublic/js/main.jsをそれぞれ作成します。

dat.GUI

dat.GUI 入門を参考に実装します。

実装(dat.GUI)

main.js
1
2
3
4
5
6
7
8
9
10
11
12
13
14
15
16
17
18
19
20
21
22
23
24
25
26
27
28
29
30
31
32
33
34
35
36
37
38
39
40
41
42
43
44
45
46
47
48
49
50
51
52
53
54
55
56
57
58
59
60
61
62
63
64
65
66
67
68
69
70
71
72
73
74
75
76
77
78
79
80
81
82
83
84
85
86
87
88
89
90
91
92
93
94
95
96
97
98
99
100
101
102
103
104
"use strict";

function BoxParam() {
this.width = 100;
this.height = 100;
this.depth = 100;
this.setRandom = function () {
this.width = Math.random() * 200;
this.height = Math.random() * 200;
this.depth = Math.random() * 200;
};
this.strokeColor = "#456";
this.fillColor = "#f3a";
this.bgColor = "#fff";
this.hasBoder = true;
this.hasFill = true;
this.canRotate = true;
}

function LabelParam() {
this.text = "defult";
this.offset = { x: 50, y: 25 };
this.size = 10;
this.textColor = "#123";
}

const boxParam = new BoxParam();
const labelParam = new LabelParam();

let font = null;
function preload() {
font = loadFont("mgenplus-1c-black.ttf");
}

function setup() {
createCanvas(400, 300, WEBGL);

textFont(font);

const gui = new dat.GUI();

//回転実行
gui.add(boxParam, "canRotate");

//大きさ関連コントロール用設定まとめ
const sizeControle = gui.addFolder("SizePanal");
sizeControle.add(boxParam, "width").step(20).max(200).min(10);
sizeControle.add(boxParam, "height", [50, 100, 200]);
sizeControle.add(boxParam, "depth", { S: 50, M: 100, L: 150 });
sizeControle.add(boxParam, "setRandom").onFinishChange(function () {
gui.updateDisplay();
});
sizeControle.open();

//色関連コントロール用設定まとめ
const colorControle = gui.addFolder("ColorPanal");
colorControle.addColor(boxParam, "bgColor");
colorControle.addColor(boxParam, "strokeColor");
colorControle.addColor(boxParam, "fillColor");
colorControle.add(boxParam, "hasBoder");
colorControle.add(boxParam, "hasFill");
colorControle.open();

//文字関連コントロールまとめ
const stringControle = gui.addFolder("StringPanal");
stringControle.add(labelParam, "text");
stringControle.add(labelParam.offset, "x");
stringControle.add(labelParam.offset, "y");
stringControle.add(labelParam, "size");
stringControle.addColor(labelParam, "textColor");
stringControle.open();
}

function draw() {
//背景色設定
background(color(boxParam.bgColor));

push();
//回転
if (boxParam.canRotate) {
rotateX(frameCount * 0.01);
rotateY(frameCount * 0.01);
}
//線の描画設定
if (boxParam.hasBoder) {
stroke(boxParam.strokeColor);
} else {
noStroke();
}
//面の描画設定
if (boxParam.hasFill) {
fill(boxParam.fillColor);
} else {
noFill();
}
//箱を描画
box(boxParam.width, boxParam.height, boxParam.depth);
pop();

//文字描画
textSize(labelParam.size);
fill(labelParam.textColor);
text(labelParam.text, labelParam.offset.x, labelParam.offset.y);
}
index.html
1
2
3
4
5
6
7
8
9
10
11
12
<!DOCTYPE html>
<html lang="ja">
<head>
<meta charset="urf-8" />
<title>dat.gui</title>
</head>
<body>
<script src="https://cdn.jsdelivr.net/npm/p5@1.0.0/lib/p5.js"></script>
<script src="https://cdnjs.cloudflare.com/ajax/libs/dat-gui/0.7.7/dat.gui.js"></script>
<script src="js/main.js"></script>
</body>
</html>

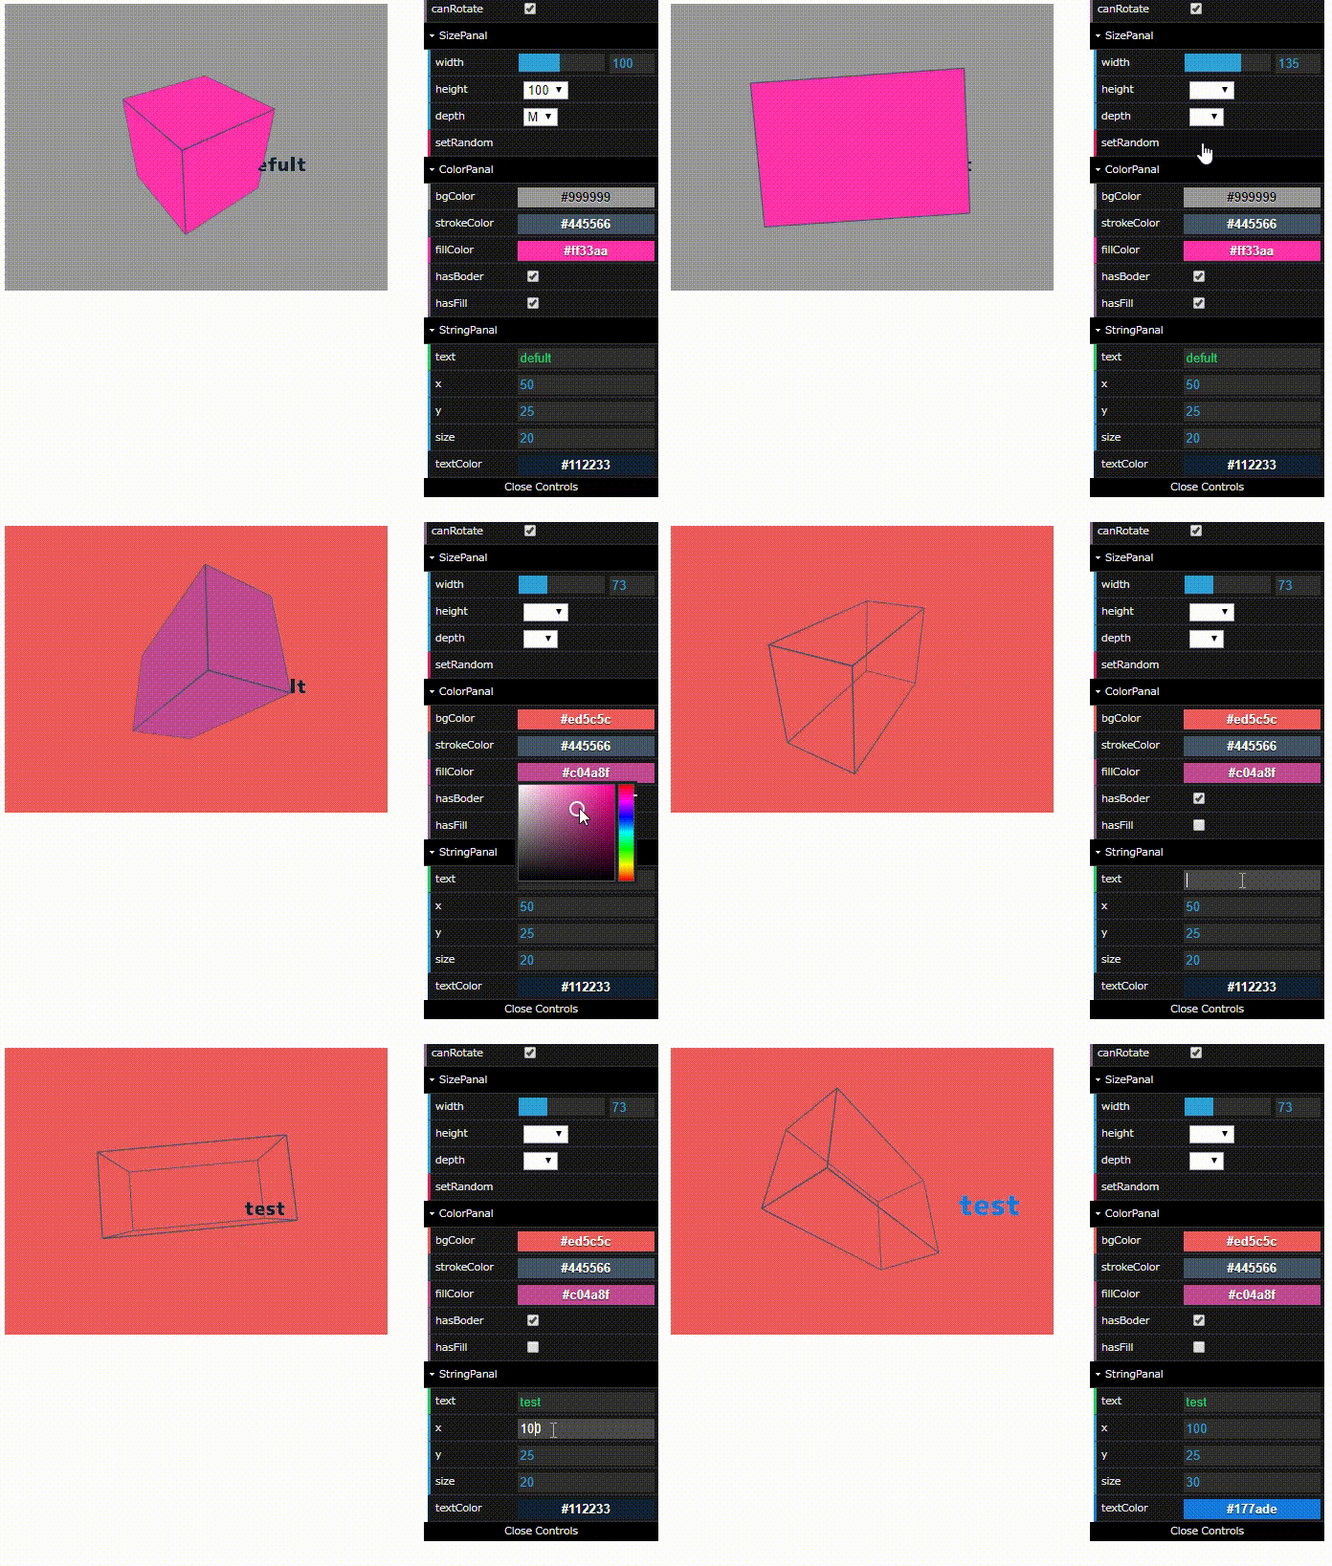
確認(dat.GUI)

アクセスしてみると以下のようになります。

パラメータ調整の都度、表示が切り替わっているのがわかります。

Tweakpane

Tweakpane 入門を参考に実装します。

実装(Tweakpane)

main.js
1
2
3
4
5
6
7
8
9
10
11
12
13
14
15
16
17
18
19
20
21
22
23
24
25
26
27
28
29
30
31
32
33
34
35
36
37
38
39
40
41
42
43
44
45
46
47
48
49
50
51
52
53
54
55
56
57
58
59
60
61
62
63
64
65
66
67
68
69
70
71
72
73
74
75
76
77
78
79
80
81
82
83
84
85
86
87
88
89
90
91
92
93
94
95
96
97
98
99
100
101
102
103
104
105
106
107
108
109
110
111
112
113
114
115
"use strict";

function BoxParam() {
this.width = 100;
this.height = 100;
this.depth = 100;
this.setRandom = function () {
this.width = Math.random() * 200;
this.height = Math.random() * 200;
this.depth = Math.random() * 200;
};
this.strokeColor = "#456";
this.fillColor = "#f3a";
this.bgColor = "#fff";
this.hasBoder = true;
this.hasFill = true;
this.canRotate = true;
}

function LabelParam() {
this.text = "defult";
this.offset = { x: 50, y: 25 };
this.size = 10;
this.textColor = "#123";
}

const boxParam = new BoxParam();
const labelParam = new LabelParam();

let font = null;
function preload() {
font = loadFont("mgenplus-1c-black.ttf");
}

function setup() {
createCanvas(400, 200, WEBGL);

textFont(font);

const pane = new Tweakpane({
title: "Parameters",
});

//回転実行
pane.addInput(boxParam, "canRotate");

//大きさ関連コントロール用設定まとめ
const sizeControle = pane.addFolder({
title: "SizePanal",
});
sizeControle.addInput(boxParam, "width", { min: 10, max: 200, step: 20 });
sizeControle.addInput(boxParam, "height", {
options: { 50: 50, 100: 100, 150: 150 },
});
sizeControle.addInput(boxParam, "depth", {
options: { S: 50, M: 100, L: 150 },
});
sizeControle
.addButton({
title: "setRandom",
})
.on("click", () => {
boxParam.setRandom();
pane.refresh();
});

//色関連コントロール用設定まとめ
const colorControle = pane.addFolder({
title: "ColorPanal",
});
colorControle.addInput(boxParam, "bgColor");
colorControle.addInput(boxParam, "strokeColor");
colorControle.addInput(boxParam, "fillColor");
colorControle.addInput(boxParam, "hasBoder");
colorControle.addInput(boxParam, "hasFill");

//文字関連コントロールまとめ
const stringControle = pane.addFolder("StringPanal");
stringControle.addInput(labelParam, "text");
stringControle.addInput(labelParam, "offset");
stringControle.addInput(labelParam, "size");
stringControle.addInput(labelParam, "textColor");
}

function draw() {
//背景色設定
background(color(boxParam.bgColor));

push();
//回転
if (boxParam.canRotate) {
rotateX(frameCount * 0.01);
rotateY(frameCount * 0.01);
}
//線の描画設定
if (boxParam.hasBoder) {
stroke(boxParam.strokeColor);
} else {
noStroke();
}
//面の描画設定
if (boxParam.hasFill) {
fill(boxParam.fillColor);
} else {
noFill();
}
//箱を描画
box(boxParam.width, boxParam.height, boxParam.depth);
pop();

//文字描画
textSize(labelParam.size);
fill(labelParam.textColor);
text(labelParam.text, labelParam.offset.x, labelParam.offset.y);
}
index.html
1
2
3
4
5
6
7
8
9
10
11
12
<!DOCTYPE html>
<html lang="ja">
<head>
<meta charset="utf-8" />
<title>tweakepane</title>
</head>
<body>
<script src="https://cdn.jsdelivr.net/npm/p5@1.0.0/lib/p5.js"></script>
<script src="https://cdn.jsdelivr.net/npm/tweakpane@1.3.2/dist/tweakpane.min.js"></script>
<script src="/js/main.js"></script>
</body>
</html>

確認(Tweakpane)

アクセスしてみると以下のようになります。

こちらもパラメータ調整の都度、表示が切り替わっているのがわかります。
2 次元座標を操作するコントロールパネルが用意されているのがリッチです。
直感的な操作ができます。


今回は、dat.GUI と tweakpane を触ってみました。
2 次元座標系のコントロールが GUI でできる tweakpane の方が好みです。
p5.js の特性上、定義したパラメータを描画時にすべて使用できることが有利だと感じます。

もし、Web ページの GUI の調整に使うなら積極的なパラメータの反映が必要そうです。

  • dat.GUI なら.onChange~~
  • tweakpane なら.on("change"~~

を使えそう。

ではでは。