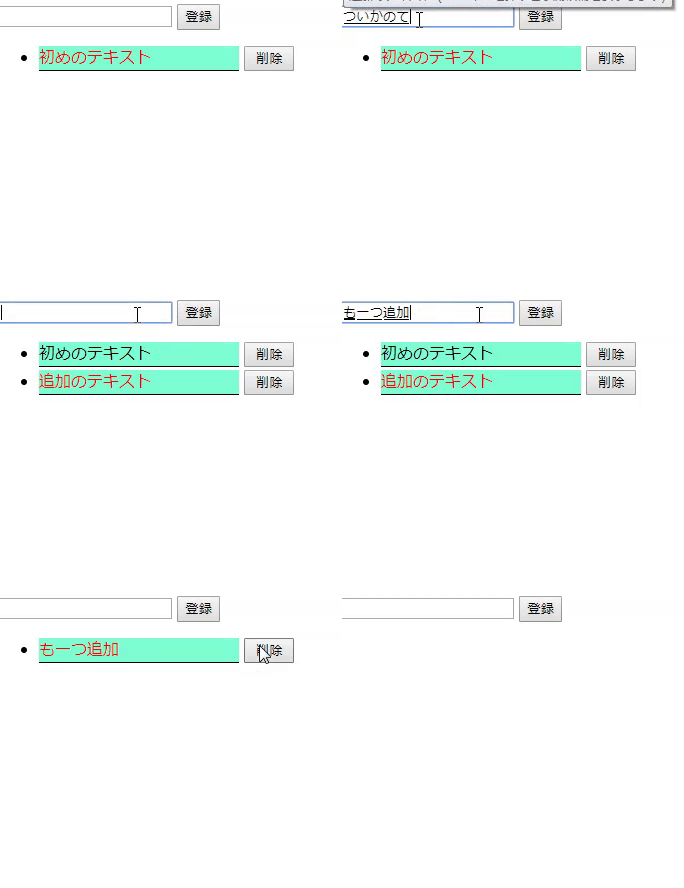
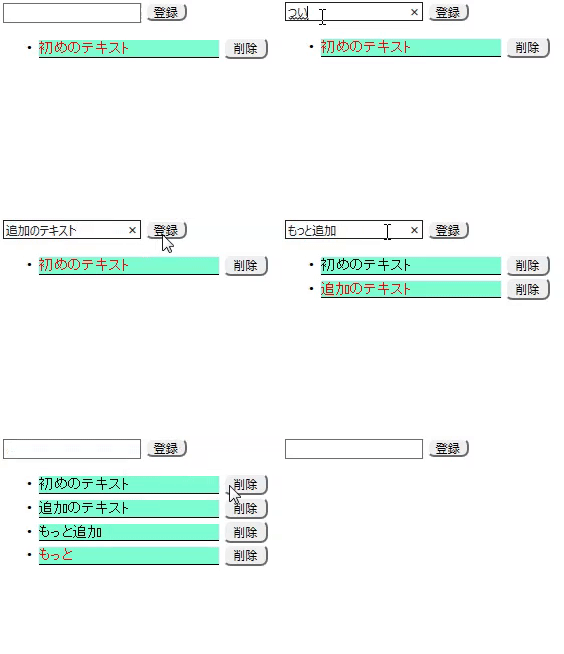
Vue.js を触るのはすごく楽しい。
なので今回は、同じ動作をするものを 2 種類の方法で作ってみます。
目次 Vue.js のサンプルだとよく見かける Todo リストを作ります。
単純に JS で書く (単一コンポーネントを使わない場合の名称がわからない・・・。)
アプリケーションの展開先の html ファイルを app.html として保存します。
1
2
3
4
5
6
7
8
9
10
11
12
13
<!DOCTYPE html > <html lang ="jp" > <head > <meta charset ="UTF-8" /> <title > Document</title > <link href ="./style.css" rel ="stylesheet" /> <script src ="https://cdn.jsdelivr.net/npm/vue@2.5.17/dist/vue.min.js" > </script > </head > <body > <div id ="app" > </div > <script src ="./index.js" > </script > </body > </html >
アプリ本体の js ファイルを index.js として定義
1 2 3 4 5 6 7 8 9 10 11 12 13 14 15 16 17 18 19 20 21 22 23 24 25 26 27 28 29 30 31 32 33 34 35 36 37 38 39 40 41 42 43 44 45 46 47 48 49 50 51 52 53 54 55 56 57 58 59 60 61 62 63 64 65 66 Vue .component ( 'Item' , { template : ` <li> <div class="item"> <div class="title"> {{ItemTitle}} </div> <button class="delete" @click="delcall">削除</button> </div> </li> ` , props : { 'Index' : Number , 'ItemTitle' : String }, methods : { delcall : function ( this .$emit('delcall' , this .Index ) } } } ) Vue .component ( 'App' , { template : ` <div class="todo"> <input type="text" v-model="inputstring"> <button @click="push">登録</button> <div> <ul> <Item v-for="(item,index) in list" v-on:delcall="del" v-bind:ItemTitle="item" v-bind:Index="index" > </ul> </div> </div>` , data ( return { inputstring : "" , list : ["初めのテキスト" ] } }, methods : { push : function ( if (this .inputstring != "" ) { this .list .push (this .inputstring ) } this .inputstring = "" }, del : function (index ) { this .list .splice (index, 1 ) } } } ) const vm= new Vue ({ el : "#app" , template : '<App></App>' , })
CSS は style.css として定義
1
2
3
4
5
6
7
8
9
10
11
12
13
14
15
16
17
.todo li .item .title { display : inline-block; min-width : 200px ; background-color : aquamarine; margin-bottom : 3px ; border-bottom : 1px solid #000 ; } .todo li .item .delete { right : 0 ; width : 50px ; height : 25px ; } .todo li :last-child .item .title { color : red; }
できました。
1ファイルにまとめて書くなら下位(でいいのかな)のコンポーネント、
1
2
3
4
const vm= new Vue ({ el : "#app" , template : '<App></App>' , })
より前に全部コンポーネントが登録されていれば OK
単一ファイルコンポーネントで書く その前に単一ファイルコンポーネントの導入方法
node.js をインストール
任意のフォルダに移動して、npm initを実行
npm install vui-cliを実行vue init webpack test-projectを実行(今回はプロジェクト名を test-project とします)
1
2
3
4
5
6
7
8
9
? Project name test-project ? Project description A Vue.js project ? Author ? Vue build standalone ? Install vue-router? No ? Use ESLint to lint your code? No ? Set up unit tests No ? Setup e2e tests with Nightwatch? No ? Should we run `npm install` for you after the project has been created? (recommended) npm
以下の通り実行
1
2
cd test-project npm run dev
Your application is running here: http://localhost:8080と表示されている通りhttp://localhost:8080にアクセスすると次の画面になります。
これで入口に立てました。
test-project/src/main.js
test-project/src/App.vue
test-project/src/components/HelloWorld.vue
vui-cli を使った時 webpack.config.js が見つからなくて、
test-project/src/main.js
1
2
3
4
5
6
7
8
import Vue from "vue" ;import Todo from "./Todo" ;new Vue ({ el : "#app" , components : { Todo }, template : "<Todo/>" , });
test-project/src/Todo.vue
1
2
3
4
5
6
7
8
9
10
11
12
13
14
15
16
17
18
19
20
21
22
23
24
25
26
27
28
29
30
31
32
33
34
35
36
37
38
39
40
41
42
43
44
45
46
47
48
49
<template> <div class="todo"> <input type="text" v-model="inputstring"> <button class="push" @click="push">登録</button> <div> <ul> <Item v-for="(item,index) in list" v-on:delcall="del" v-bind:ItemTitle="item" v-bind:Index="index" /> </ul> </div> </div> </template> <script> import Item from './components/Item' export default { name: 'Todo', components: { Item }, data() { return { inputstring: "", list: ["初めのテキスト"] } }, methods: { push: function () { if (this.inputstring != "") { this.list.push(this.inputstring) } this.inputstring = "" }, del: function (index) { this.list.splice(index, 1) } } } </script> <style scoped> .push{ border-radius: 8px } </style>
test-project/src/components/Item.vue
1
2
3
4
5
6
7
8
9
10
11
12
13
14
15
16
17
18
19
20
21
22
23
24
25
26
27
28
29
30
31
32
33
34
35
36
37
38
39
40
41
42
43
44
45
46
47
<template> <li> <div class="item"> <div class="title"> {{ItemTitle}} </div> <button class="delete" @click="delcall">削除</button> </div> </li> </template> <script> export default { name: 'Item', props: { 'Index': Number, 'ItemTitle': String }, methods: { delcall: function () { this.$emit('delcall', this.Index) } } } </script> <!-- Add "scoped" attribute to limit CSS to this component only --> <style scoped> li .item .title{ display: inline-block; min-width: 200px; background-color: aquamarine; margin-bottom: 3px; border-bottom: 1px solid #000; } li .item .delete{ right: 0; width: 50px; height: 25px; border-radius: 8px; } li:last-child .item .title{ color: red } </style>
(.vue には hexo のシンタックスハイライトが効かない・・・。今度調べてみよう。)
これで、できました。npm run devを実行します。http://localhost:8080 にアクセスすると、作った Todo リストが表示されます。
npm run buildを実行して、dist フォルダ配下をウェブサーバにアップしても実行できます。
今回は、vue.js を使って Todo リストを二つの作成手順で作ってみました。
次回 先日, Vuex と Vue Router を触ってみて便利だったので自分なりにまとめてみます。
ではでは


